
Mehndi is one of the most beautiful and traditional forms of body art loved by girls and women of all ages. Whether it’s a wedding, Eid, Diwali, Rakhi, Karva Chauth, or a small family function, applying mehndi on the front hands instantly enhances your look. But if you’re just starting out, you might feel confused about which design to try first.
Don’t worry! In this detailed blog post, we will explore beginner cute simple mehndi designs for front hands that are easy to draw, minimal, stylish, and perfect for anyone learning henna art. These designs require basic shapes like circles, lines, leaves, dots, and flowers — making them ideal for beginners.
Let’s get started 🌸
Table of Contents
Why Choose Simple Mehndi Designs as a Beginner?
If you’re new to mehndi, starting with heavy bridal designs can feel overwhelming. Complex patterns require steady hands, experience, and time. Simple designs, on the other hand:
- Are easy to create
- Take less time
- Look clean and elegant
- Help improve your practice
- Reduce mistakes
- Build confidence
Front hand mehndi designs are more visible, so keeping them neat and balanced is important. Minimal and cute patterns always look classy.
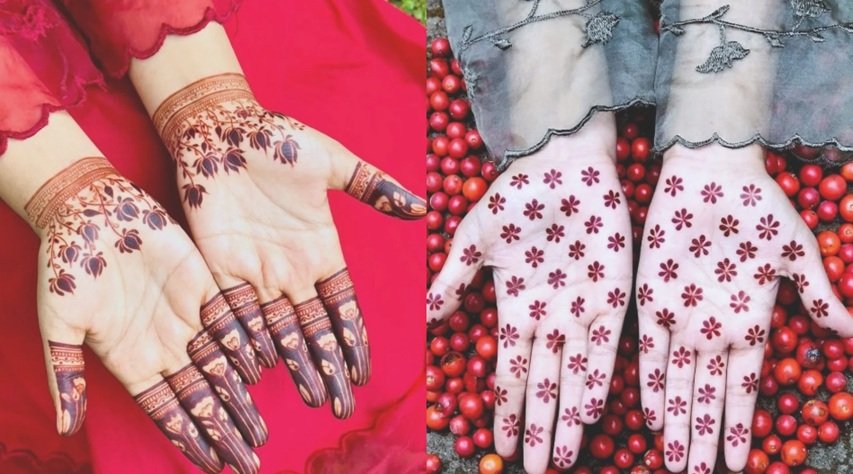
1. Simple Floral Mehndi Design for Front Hand
Floral designs are the easiest and most beginner-friendly option.
How to Draw:
- Start with a small circle in the center of your palm.
- Add 6–8 rounded petals around it.
- Outline the petals to make them bold.
- Add tiny dots around the flower.
- Draw small leaves extending toward fingers.
You can keep the fingers simple by adding:
- Small horizontal lines
- Dotted chains
- Tiny leaf patterns
Why It’s Perfect for Beginners
Flowers are forgiving. Even if petals aren’t perfectly equal, the design still looks beautiful. It’s cute, traditional, and very easy to master.
2. Minimal Mandala Mehndi Design
Mandala designs are trendy and symmetrical, yet simple enough for beginners.
Steps to Create:
- Draw a small dot in the center.
- Surround it with a circle.
- Add a layer of petals.
- Create another outer layer with pointed petals.
- Fill empty spaces with dots and lines.
Keep fingers minimal with:
- Straight bands
- Dots and tiny curves
- Simple leaf chains
Pro Tip
Take your time with symmetry. Slow and steady hand movement gives cleaner results.
Mandala designs look very neat and modern, perfect for festivals.
3. Easy Finger-Focused Mehndi Design
If you don’t want to fill the entire palm, finger designs are a great choice.
Design Idea:
- Draw leafy vines on two fingers.
- Add small flowers at the base of fingers.
- Leave the palm mostly empty.
- Add a tiny flower or simple dot circle in the center.
This style looks stylish and minimal. It’s perfect for college girls or small family gatherings.
Why Beginners Love It
It’s less stressful since you don’t have to fill the entire hand. Even if one finger design isn’t perfect, it doesn’t ruin the whole look.
4. Bracelet Style Front Hand Mehndi
Bracelet mehndi looks like jewelry on your hand and is super easy.
How to Make It:
- Draw a thick band near the wrist.
- Fill it with criss-cross lines or small flowers.
- Add dots along the edges.
- Draw a thin chain connecting it to a ring-style design on one finger.
You can add:
- Small circles as a “ring”
- Tiny leaves around the band
- Dot detailing for a finishing touch
This design is quick, elegant, and perfect for beginners who want something modern.
5. Half Palm Cute Mehndi Design
Half-hand mehndi designs are trending because they look stylish and not too heavy.
How to Draw:
- Draw a large flower on one side of your palm.
- Add leaves flowing diagonally.
- Fill small spaces with dots.
- Keep the other half of the palm mostly empty.
Decorate fingers with:
- Simple curved lines
- Small petal shapes
- Minimal shading
This design is perfect for Eid or Diwali celebrations.
6. Arabic Style Simple Mehndi Design
Arabic mehndi designs are known for their flowing patterns and spacing. They don’t cover the entire palm, making them beginner-friendly.
How to Create:
- Start from the bottom corner of the palm.
- Draw a medium-sized flower.
- Extend a leafy vine diagonally toward the index finger.
- Add another flower halfway through.
- Fill empty spaces with dots and small leaves.
Arabic designs look elegant because of the spacing. Don’t overcrowd the design.
7. Cute Heart Mehndi Design
This design is perfect for teenagers and young girls.
Steps:
- Draw a small heart in the center.
- Surround it with tiny flowers.
- Add leafy vines extending outward.
- Decorate fingers with dots and thin lines.
You can also combine heart and mandala elements for a unique look.
It’s simple, cute, and Instagram-worthy 💖
8. Simple Tikki Mehndi Design
Tikki designs are traditional and very beginner-friendly.
How to Draw:
- Draw a bold circle in the center.
- Fill it with small patterns like lines and dots.
- Add a decorative border around it.
- Extend small patterns toward fingers.
Tikki designs are popular for festivals and family events. Even minimal detailing looks beautiful.
9. Ring Style Mehndi Design
Ring mehndi is modern and minimal.
How to Make:
- Draw a circle on one finger like a ring.
- Extend a thin chain to the wrist.
- Add small flowers along the chain.
- Decorate wrist with a small bracelet pattern.
This is perfect if you want something trendy and super easy.
10. Dotted Mehndi Design for Beginners
Dots are the foundation of mehndi art.
Try This:
- Create a dotted circle in the center.
- Add small curved lines around it.
- Decorate fingers with dotted bands.
- Add small leaves between dot lines.
Dots can transform even the simplest design into something elegant.
Essential Mehndi Tips for Beginners
If you’re just starting, these tips will help you improve quickly:
1. Practice on Paper First
Draw flowers, leaves, and lines on paper before applying on your hand.
2. Hold the Cone Properly
Hold the cone like a pen. Apply gentle pressure for thin lines.
3. Start with Basic Shapes
Learn:
- Circles
- Lines
- Leaves
- Petals
- Dots
Everything in mehndi is made from these simple shapes.
4. Don’t Rush
Slow movement gives clean designs. Rushing leads to shaky lines.
5. Let Mehndi Dry Naturally
Avoid using a dryer. Let it dry for 4–6 hours for dark color.
6. Apply Lemon-Sugar Mix
Lightly dab lemon and sugar mixture for deeper stain.
Occasions to Try Simple Front Hand Mehndi Designs
These beginner cute simple mehndi designs for front hands are perfect for:
- Eid
- Diwali
- Rakhi
- Karva Chauth
- Weddings (for guests)
- Engagement functions
- Birthday parties
- College events
Even for casual days, a minimal design can elevate your look.
How to Make Your Mehndi Darker
Every beginner wants dark mehndi color. Follow these tips:
- Keep mehndi for at least 6–8 hours.
- Avoid washing hands immediately.
- Apply clove steam for better stain.
- Apply mustard oil after scraping off dried mehndi.
- Avoid water for 24 hours if possible.
Dark mehndi makes even simple designs look stunning.
Final Thoughts
Trying beginner cute simple mehndi designs for front hands doesn’t have to be difficult. You don’t need advanced skills or heavy patterns to look beautiful. Sometimes, the simplest designs create the most elegant appearance.
Start with small flowers, mandalas, dots, and leaf patterns. Practice regularly and experiment with spacing and placement. Over time, your hand control will improve, and you can try more detailed designs.